
Everything was fine until yesterday. You opened your laptop, started working, placed your finger on the touchpad – and the cursor wouldn’t budge. No clicking, no scrolling – let alone two-finger zooming – absolutely nothing. It feels as though the touchpad has simply refused to cooperate. And if you don’t happen to have a USB mouse handy, you’re left completely stranded.
Whether the cursor is frozen, the touchpad is entirely unresponsive, or gestures have suddenly stopped working – even in 2026, this remains one of the most common issues faced by laptop users. And the most frustrating part is that it happens without any warning – working perfectly fine in the morning, only to quit by the afternoon.
However, it might come as a relief to learn that 80% of touchpad issues can be resolved with simple fixes that take less than five minutes. All you need is the right diagnosis and the correct steps – both of which we provide in this guide. If your touchpad isn’t working, simply follow the steps below, one by one, without panicking.
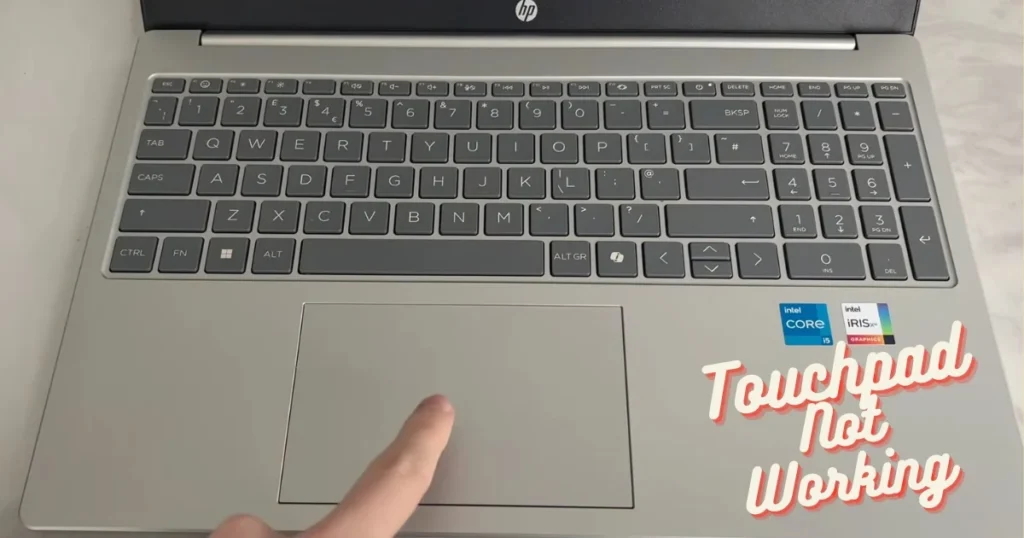
Why Does the Touchpad Stop Working? – 10 Most Common Reasons
Before we begin troubleshooting, it is essential to understand the actual underlying cause behind a non-functional touchpad. The reasons for a touchpad failure can range from disabled settings, outdated drivers, or system glitches to hardware malfunctions.
1. Touchpad Accidentally Disabled (Fn Key)
The most common reason is that a “malfunctioning” touchpad has actually been turned off accidentally by pressing a specific key combination. Many laptops feature a hardware switch or a keyboard shortcut (typically Fn + an F-key) that toggles the touchpad on or off. Pressing this key combination inadvertently can result in the touchpad being disabled.
2. Drivers Are Corrupt or Outdated
If your touchpad is not working, the culprit could be missing or outdated drivers. Driver-related issues account for approximately 25% of all touchpad problems, particularly following a Windows Update.
3. An External Mouse Is Connected
Windows sometimes automatically disables the touchpad when an external mouse is connected. If a USB or Bluetooth mouse is plugged in, certain system settings may automatically disable the internal touchpad to prevent conflicts arising from dual pointer input.
4. Touchpad Is Turned Off in Windows Settings
The touchpad (often listed as a “Pointing Device”) may be disabled within the operating system (OS) settings or within the BIOS/UEFI setup interface. Specifically within Windows, the touchpad can be toggled off via the system’s “Settings” menu.
5. Issues Arising After a Windows Update
In Windows 11, touchpad malfunctions frequently occur immediately following a Windows Update. Windows Update may install generic drivers that overwrite or remove advanced features specific to your hardware. Driver conflicts following system updates are a very common occurrence.
6. Touchpad Is Disabled in the BIOS
Your touchpad may have been disabled directly within the system’s BIOS settings. This happens occasionally, particularly after a major system update or if the BIOS has been reset.
7. Third-Party Application Conflicts
If another application running on the system (such as Logitech G HUB) is interfering with touchpad operations, it may lead to touchpad issues.
8. Dirty Touchpad
Ensure that there is no dirt, grease, liquid, or food residue on the touchpad or on your finger–the touchpad requires good contact with your finger to function correctly. The touchpad surface must be clean; dirt or residue can interfere with the capacitive touch sensor.
9. Hardware Failure (Ribbon Cable / Physical Damage)
Faulty touchpad hardware or a loose connection in the ribbon cable located inside the laptop can result in a permanent failure. Hardware failure can also occur due to aging and general wear and tear.
10. Swollen Battery – The Most Dangerous Cause
If the laptop’s keyboard or touchpad appears raised or swollen, it indicates a failure in the laptop’s Li-ion battery. This swelling occurs when the electrolyte separating the battery’s internal layers converts into gas. The trackpad, keyboard, and bottom panel are the most common areas where a swollen battery becomes visible. Occasionally, a swollen battery may cause issues elsewhere in the laptop – even before the swelling becomes visible to the naked eye.
Software or Hardware Problem? – How to Identify It
Knowing this is crucial because the solutions are entirely different.
Your touchpad issue is software-related if it was working recently but stopped functioning after a Windows update, or if it works intermittently.
A hardware issue is more likely if you have spilled liquid on the laptop, if the laptop was dropped recently, or if the touchpad has never worked correctly in the past.
⚠️ The Most Important Test: If your touchpad works in the BIOS but not in Windows, it is definitely a software issue that can be fixed. If the touchpad does not function even on the BIOS/UEFI screen, it is likely a hardware issue.
| Sign | Software Problem | Hardware Problem |
|---|---|---|
| When did it happen? | After Update/Restart | No change/liquid spill |
| Working in the BIOS | Yes | No |
| In Safe Mode | If it works, it’s software. | If it doesn’t work, it’s a hardware issue. |
| Physical Damage | No | Bulge, Crack, Looseness |
| Fix | Driver/Settings | Repair/Replacement |
5-Minute Quick Fixes – Try These First
Before diving into deep troubleshooting, start with simple checks (Is it enabled? Is it clean? Has it been restarted?), then update or reinstall the drivers, and finally, inspect the hardware or firmware settings.
1. Press Fn + Function Key – Do This First!
Look for a function key (F1–F12) that features a touchpad icon. Common combinations include Fn+F7, Fn+F9, or Fn+F5. Press your laptop’s touchpad toggle combination once and check whether the cursor moves.
Brand-Specific Fn Keys:
| Laptop Brands | Touchpad Toggle Key |
|---|---|
| HP | Fn + F7 (Or double-tap the left corner) |
| Dell | Fn + F5 |
| Lenovo | Fn + F8 |
| ASUS | Fn + F6 Or Fn + F9 |
| Acer | Fn + F6 Or Fn + F7 |
In some HP/Lenovo models, double-tapping the top-left corner of the touchpad acts as an on/off switch.
2. Restart the Laptop
A simple restart can clear temporary operating system bugs or memory conflicts that may have caused the touchpad controller to freeze.
Note: Do not touch the touchpad until the system has finished booting, as it undergoes a calibration process during startup.
3. Disconnect External Devices
External USB devices can interfere with touchpad functionality. Disconnect all USB devices, such as mice, keyboards, and hubs. Restart the laptop and test the touchpad before reconnecting the devices.
4. Clean the Touchpad Surface
Ensure that there is no dirt, grease, liquid, or food residue on the touchpad or your finger.
How to Clean:
- Turn off the laptop.
- Lightly dampen a soft, lint-free cloth (isopropyl alcohol is best).
- Gently wipe the touchpad.
- Allow it to dry completely, then turn on the laptop.
5. Run the Windows Troubleshooter
Windows features a built-in troubleshooter that automatically detects and fixes common hardware issues. Go to Settings > Update & Security > Troubleshoot > Additional troubleshooters > Hardware and Devices. Run the troubleshooter and apply the recommended fixes.
How to Enable the Touchpad in Windows Settings
If the quick fixes didn’t work, it’s time to dig deeper into the Windows Settings.
In Windows 11:
Open Settings > Bluetooth & devices > Touchpad (Windows 11). Ensure that the Touchpad toggle is set to “On,” and uncheck “Leave touchpad on when a mouse is connected” if you use an external mouse.
Step-by-Step:
- Press Windows key + I – Settings will open.
- Click on Bluetooth & devices.
- Click on Touchpad.
- Toggle the Touchpad switch to “On” at the top.
- Check the box for “Leave touchpad on when a mouse is connected” at the bottom.
- Expand the “Taps” section and verify that “Tap with a single finger to single-click” is turned on.
In Windows 10:
Press the Windows key, type “touchpad,” and select the “Touchpad settings” option from the search results. In the Touchpad window, set the Touchpad On/Off toggle switch to “On.” If it is currently “Off,” switch it to the “On” position. Test the touchpad.
Check Mouse Properties:
Open the touchpad settings (for Windows 11) by clicking on “Additional Mouse Settings.” In the Mouse Properties menu, switch to the “Touchpad” tab (usually the last tab). Now, uncheck the option labeled “Disable Internal Pointing Device When External USB Pointing Device is Attached.” Then, apply the changes and restart the system. After restarting, verify that the system’s touchpad is functioning correctly.
Driver-Level Troubleshooting – Check the Driver If the Touchpad Is Not Working
Driver issues are one of the primary reasons why a touchpad may fail to work. Updating or reinstalling the touchpad drivers can often resolve the problem.
Step 1: Locate the Touchpad in Device Manager
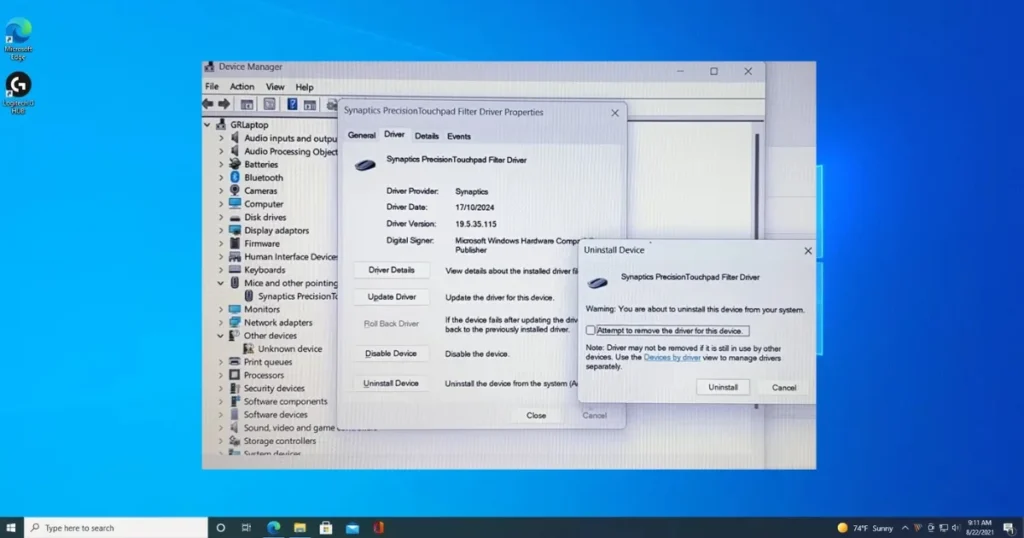
Open Device Manager by right-clicking on the Start button and selecting ‘Device Manager.’ Expand the ‘Mice and other pointing devices’ or ‘Human Interface Devices’ section. If you see an entry for your touchpad (often listed under the name Synaptics or ELAN), great! If not, this may indicate a deeper underlying issue.
If a yellow exclamation mark appears next to the touchpad driver in Device Manager, it signals that there is a problem with the driver, and you should update or reinstall it immediately.
Step 2: Update the Driver
You can use either Windows Update or Device Manager to update the driver.
Via Device Manager:
- Press Windows + X and select Device Manager.
- Expand “Mice and other pointing devices.”
- Right-click on the touchpad → Update driver.
- Select “Search automatically for drivers.”
- Windows will find and install the latest driver.
From the Manufacturer’s Website:
- HP → support.hp.com
- Dell → dell.com/support
- Lenovo → support.lenovo.com
- ASUS → asus.com/support
- Acer → acer.com/support
Step 3: Reinstall the Driver (Clean Install)
Sometimes, an update isn’t enough – a clean driver installation is required. In Device Manager, right-click on the touchpad and select “Uninstall device.” Check the box labeled “Delete the driver software for this device” if the option is available. Restart your laptop. Windows will automatically reinstall the default drivers, or you can download specific drivers from the manufacturer’s website.
Reinstalling the touchpad forces Windows Update to download the latest drivers.
Step 4: Roll Back the Driver
If your touchpad stopped working after a recent update, rolling back the driver may resolve the issue. In Device Manager, double-click on the touchpad device, navigate to the Driver tab, and click “Roll Back Driver” if the option is available.
Step 5: Synaptics vs. Generic Driver – What’s the Difference?
The Synaptics touchpad driver allows Windows 11 to communicate effectively with the touchpad hardware. It enables basic cursor movement as well as advanced features such as multi-finger gestures, scrolling, and palm rejection. While Windows 11 can install a generic driver, Synaptics-specific drivers typically deliver superior performance.
How to Check Touchpad Settings in BIOS
Access your laptop’s BIOS/UEFI settings during startup (usually by pressing F2, F10, or Del). Ensure that the touchpad is set to “Enabled” and the mode is set to “Basic” or “Advanced” (not Serial PS/2).
Steps to Enter BIOS:
- Turn off the laptop.
- Press the Power button and immediately press F2 (or F10 / Del – depending on the brand) repeatedly.
- The BIOS/UEFI menu will open.
- Navigate to the Advanced or Main tab.
- Find the “Internal Pointing Device” or “Touchpad” option.
- Set it to “Enabled”.
- Save & Exit (Press F10).
If, after performing a BIOS restoration and EC reset, the touchpad is functional on the BIOS/UEFI screen but stops working upon entering the Windows system, the next step is to update the BIOS and drivers.
Brand-Specific Solutions – HP, Dell, Lenovo, ASUS, Acer
Every laptop brand features specific settings and tools. Check out these brand-specific tips for your device:
HP Laptops:
On some HP models, double-tapping the top-left corner of the touchpad acts as an on/off switch. Sometimes, there is a small LED light located in this top-left corner – if it is lit, the touchpad is disabled. Double-tap it – the light will turn off, and the touchpad will become active.
Dell Laptops:
Touchpad issues can stem from outdated or corrupt drivers, incorrect touchpad settings, hardware failure, or various other causes. Ensure that your BIOS and Chipset drivers are updated to the latest versions. The Dell SupportAssist app is a highly useful tool for Dell laptops, as it automatically detects issues.
Lenovo Laptops:
Most touchpad problems can be resolved by checking the system settings or by updating drivers via the Lenovo support website. Sometimes, the solution is as simple as pressing a specific function key combination – such as Fn + F8 (on many Lenovo models).
Try updating the I2C HID device driver, which is commonly used for Yoga touchpads. Open Device Manager, expand “Human Interface Devices,” locate the I2C HID device, right-click on it, and select “Update driver.”
ASUS Laptops:
Try enabling or disabling the touchpad function using a function key (hotkey). Look for the touchpad hotkey on your keyboard – it is typically located on the F6 or F9 key.
If the function key does not work, try reinstalling the ASUS System Control Interface driver.
Acer Laptops:
Acer laptops often utilize a function key combination to toggle the touchpad on and off. Examine your keyboard closely – you will often find a small touchpad icon located on the F6, F7, or F2 keys.
Swollen Battery – A Hidden and Dangerous Cause
If your touchpad is not working and you observe the following accompanying symptoms, be on alert immediately:
Here are some major signs to watch out for: the laptop wobbles back and forth when placed on a flat surface (assuming none of the rubber feet are missing). Some keys on the keyboard are not functioning correctly. The trackpad does not respond properly to finger movements, and/or its buttons are difficult to click. When the laptop is closed, there is a noticeable gap between the keyboard and the screen. Parts of the laptop’s bezel or casing repeatedly pop out of place.
Why Do Batteries Swell?
A swollen lithium-ion battery is caused by the breakdown of internal components within the battery pack. This breakdown can occur because the battery is old, or because it has been damaged by excessive heat or improper charging. When the components of a lithium-ion battery fail to function correctly, they generate excess current; this produces gases that accumulate inside the battery, causing its outer casing to bulge outward.
What Should You Do Immediately?
Turn off the laptop immediately; use the “Shut Down” option rather than “Sleep.” If the laptop is currently charging, unplug the charger at once. Do not use or charge the laptop while the battery is swollen. Using the device in this condition poses a risk of explosion or fire. Place the laptop in a location where it is unlikely to be disturbed or moved, and keep it away from any flammable materials.
If the battery is swollen or bulging, it must be removed from the computer and replaced.
How to Prevent Battery Swelling?
Avoid leaving your laptop plugged in continuously. Lithium-ion batteries require regular charging and discharging cycles to maintain the integrity of their internal components. Protect your laptop from extreme heat as much as possible. If you notice that the battery is no longer holding a charge effectively, replace it promptly.
Advanced Troubleshooting – When Nothing Works
Perform a Hard Reset
A hard reset clears temporary hardware configurations that might be blocking the touchpad. Completely shut down the laptop. If possible, remove the battery, press and hold the power button for 30 seconds, then reconnect everything and restart.
Check in Safe Mode
Boot the system into Safe Mode. If the touchpad works in Safe Mode, a third-party application or service is causing a conflict.
How to Enter Safe Mode:
- Settings > Update & Security > Recovery > Advanced startup > Restart now
- Troubleshoot > Advanced options > Startup Settings > Restart
- Press 4 or F4 – Safe Mode will be enabled
Perform a Clean Boot
Perform a clean boot of the system and check if the touchpad is functioning correctly. If it is, enable the services/processes one by one (those that were disabled during the clean boot process) until you identify the problematic one. Once found, either keep the problematic process disabled at system startup or uninstall it (if it is not essential).
Use System Restore
If the touchpad was working properly until a few days ago, you can use System Restore to revert the system to that specific point.
- Press Win + R, type
rstrui, and press Enter. - Select “Choose a different restore point.”
- Select a restore point from a date when the touchpad was working correctly.
- Next > Finish – System Restore will begin.
Uninstall a Problematic Windows Update
If the issue began after the latest Windows update, an incompatibility between that specific update and the system may be the cause. Uninstalling it could resolve the problem. Right-click on the Windows icon and select Settings. Navigate to the Windows Update tab and select Update History in the right pane. In the Related Settings section, open Uninstall Updates and select the latest Windows 11 update. Click Uninstall and follow the prompts. Once the update has been uninstalled, restart your PC and check if the touchpad is functioning correctly.
💰 Hardware Repair – When and at What Cost?
If all software solutions have failed and the problem is definitely hardware-related, then repair or replacement remains the only option.
Touchpad Repair/Replacement Costs:
If only the touchpad itself is replaced, the cost typically ranges between $15.00 and $40.00. For laptops where the touchpad is built into the keyboard assembly (forming a single unit with the mouse) or is part of the bezel, the cost is significantly higher. For such touchpads, the price can range from $40 to $200.
Depending on the laptop model or brand, the price range for touchpad replacement or repair starts at $75 (excluding the cost of the part itself), and the process takes approximately 45 minutes.
Can You Repair It Yourself?
It is highly unlikely that a touchpad can be repaired; if it is defective, it will almost certainly need to be replaced. If there is a physical fault with the touchpad, repairing it requires an understanding of how the device functions, skills in electronics (such as soldering), and specialized tools.
Alternative – Use a USB Mouse
If repairing the laptop is not within your budget, using a USB mouse with your laptop is a viable alternative. A good wireless USB mouse can be purchased for just $5–$15.
Windows vs. Mac – Repair Cost Comparison
| Device | Touchpad Only | Touchpad + Keyboard Assembly | Labour |
|---|---|---|---|
| Windows Laptop | $15-$40 | $40-$200 | $30-$75 |
| MacBook | N/A (Not separately) | $249-$799 | Included |
Free Tools That Will Help You
| Tool | What does it do | Link |
|---|---|---|
| Windows Device Manager | Driver Check/Update/Reinstall | Built-in (Win+X) |
| Windows Troubleshooter | Detect Hardware Problem | In Settings |
| Driver Booster Free | Automatic Driver Updates | iobit.com |
| Manufacturer Support | Brand-specific drivers | HP/Dell/Lenovo/ASUS |
| HWMonitor | Hardware Temperature/Health | cpuid.com |
FAQs – About Touchpad not working
Q1: My touchpad isn’t working – what should I do first?
First, press Fn + Function key (F5/F6/F7/F8/F9 – depending on the brand). This is the most common cause. If this doesn’t resolve the issue, go to Settings > Bluetooth & devices > Touchpad and check that the toggle is switched “On.” Then, restart your laptop.
Q2: The touchpad works in Safe Mode but not in Normal Mode – what should I do?
If the touchpad works in Safe Mode, it confirms that a third-party application or service is causing a conflict. Perform a “Clean Boot” to identify the problematic app and then uninstall it.
Q3: The touchpad isn’t even appearing in Device Manager – what should I do?
Check your BIOS Settings – the touchpad may be disabled there. Restart your laptop and enter the BIOS setup (usually by pressing F2, F10, or Del during startup). If the touchpad does not appear in the BIOS either, it indicates a hardware issue – visit a service center.
Q4: The touchpad is working, but clicking isn’t working – what should I do?
Go to Settings > Bluetooth & devices > Touchpad > Taps and check that “Tap with a single finger to single-click” is enabled. Some new gesture features can cause erratic cursor movement, as most are enabled by default. You can disable or modify these features within the touchpad driver properties.
Q5: Can a Windows Update break the touchpad?
Yes. Windows Updates can install generic drivers that remove advanced features. Driver conflicts are common after updates. In such cases, roll back the driver or download the specific driver from the manufacturer’s website.
Q6: How much does it cost to replace a touchpad?
Replacing just the touchpad costs between $15 and $40. If replaced along with the keyboard assembly, the cost ranges from $40 to $200. Labor charges are separate ($30–$75). For a MacBook, the cost can range from $249 to $799.
Q7: My MacBook trackpad isn’t working – what could be the cause?
A swollen battery can cause the trackpad to malfunction in certain MacBook Pro configurations. Trackpad issues are typically caused by a defective battery that expands and exerts pressure on the trackpad.
Q8: Can an external mouse be considered a permanent solution?
If the touchpad cannot be fixed, a wireless USB mouse ($5–$15) serves as a good temporary or permanent solution. However, if the touchpad appears bulging, you should definitely have the battery checked – this poses a safety risk.
Q9: Touchpad gestures (two-finger scroll, pinch-to-zoom) are not working – but everything else is fine?
The Synaptics touchpad driver is essential for smooth touchpad performance. If the driver is missing, outdated, or incompatible, touchpad gestures may stop working or behave unpredictably. Install the manufacturer-specific driver; gestures often do not work correctly with the generic Windows driver.
How to Avoid Touchpad Problems in the Future – Pro Tips
- ✅ Clean the touchpad regularly – Wipe it down once a week with a soft cloth.
- ✅ Keep drivers updated – Regularly updating the BIOS, Windows, and drivers improves system stability and performance.
- ✅ Create a Restore Point before Windows Updates – Create a system restore point before making driver or registry changes so that you can easily undo those changes if necessary.
- ✅ Monitor battery health – If you notice that the battery is not holding a charge properly, replace it promptly.
- ✅ Avoid placing the laptop on soft surfaces – Beds and pillows block ventilation, causing the battery to overheat.
- ✅ Memorize Fn key combinations – Familiarize yourself with your laptop’s toggle keys to avoid accidentally pressing them.
Final Thoughts
If your touchpad isn’t working, there is no need to panic. As you’ve seen in this guide, in 80% of cases, the issue lies at the software level and can be resolved within minutes through an Fn key toggle, a check of Windows settings, or a driver reinstallation. In the remaining 20% of cases, you may need to adjust BIOS settings, perform a hardware inspection, or – in the worst-case scenario – replace the touchpad.
Visit fixtech.in for more tips and professional services – Windows 11 optimization guides are available there.
Most importantly, if your touchpad feels raised or the device casing appears swollen, have the battery checked immediately. A swollen battery isn’t just a touchpad issue – it poses a serious risk of fire or explosion. For all other situations, systematically follow the steps outlined in this guide – progressing from the simple to the complex – and you will undoubtedly resolve the headache of your non-functional touchpad. 💻✅