
Are you frequently seeing a “Limited Connectivity” message on your Windows 11 laptop or desktop? Does the Wi-Fi appear connected, yet the internet doesn’t work? Do pages fail to load in your browser, YouTube keep buffering, and online games lag so badly that playing becomes impossible? If you are facing these issues, you aren’t alone. Millions of users in India are grappling with this problem – especially when ISP networks like BSNL, Jio Fiber, or Airtel are already unstable, and Windows 11 introduces new glitches through its updates.
This guide is for you. We will cover, step-by-step, every method to completely resolve the “Limited Connectivity” issue. No fluff – just practical, effective solutions.
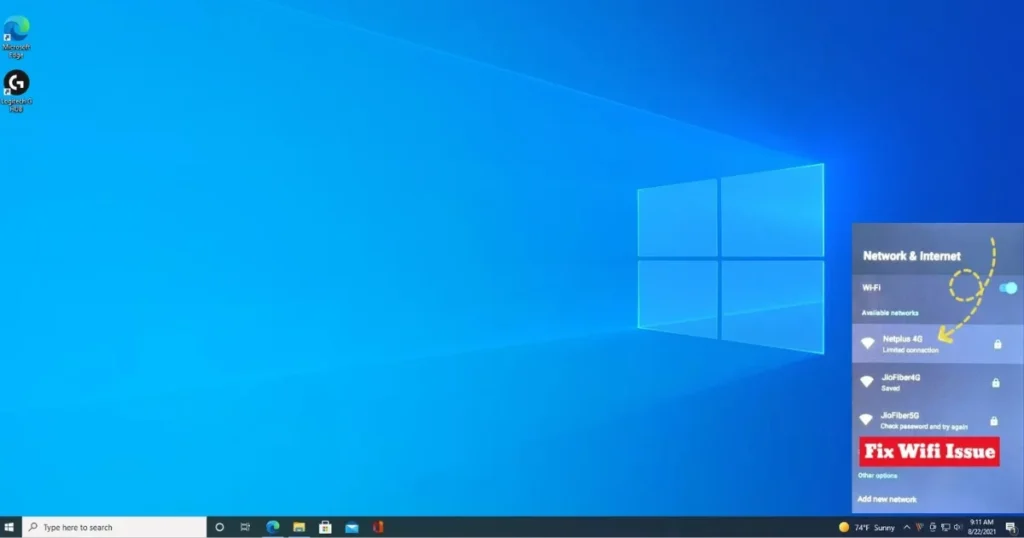
What exactly is “Limited Connectivity”?
First, let’s understand where this error comes from. On a Windows computer, the “Limited or No Connectivity” error appears when the system fails to obtain a valid IP address from the DHCP server (i.e., your router or modem). In such a scenario, the computer attempts to connect to the internet using an arbitrary IP address that the network does not recognize; the result is the “Limited or No Connectivity” message.
To determine whether your PC has limited connectivity, Windows sends a small HTTP request over the internet. If there is no response from the server, this icon appears.
Simply put: your PC is connected to the Wi-Fi, but it cannot access the internet.
Common causes of limited connectivity
There can be several reasons for this issue. Incorrect IP configuration, slow or failing DNS servers, faulty network drivers, and an overprotective firewall are all common causes behind this classic Windows problem.
Some other reasons frequently observed, particularly in India, include:
- ISP-related outages or speed throttling – this is quite common with BSNL and certain local ISPs.
- Outdated router firmware – many people buy a router but fail to update its firmware for years.
- Incorrect date and time settings – this is a common reason why Wi-Fi displays “Limited Access.”
- Power Management Settings – depending on your power management settings, Windows might turn off the network adapter when the battery is low, causing the Wi-Fi to show “Limited Access.”
- Network connectivity issues have been particularly common following updates like Windows Update KB5044284; these include limited or no internet access, failure to obtain an IP address, the device adapter disappearing, and DNS lookup failures.
- Depending on your ISP, you may have a limited or unlimited data plan. If you have a data cap and have exceeded it, the Wi-Fi connection may also display “Limited Access.”
Ways to fix limited connectivity (step-by-step)
Now, let’s get down to business. Follow the methods listed below one by one – starting with the simple ones and moving towards more in-depth fixes.
Method 1: Restart the router and PC
It may sound very basic, but in most cases, this does the trick.
Temporary glitches in the router or network adapter can cause limited connectivity. A quick restart refreshes the network configuration. To do this, turn off the router and unplug it for 30 seconds. Then, restart your PC. Once the PC has rebooted, turn the router back on and check if the issue is resolved.
If your router supports it, wait 2–5 minutes to allow the Wi-Fi to fully re-negotiate DHCP leases.
Method 2: Forget and Reconnect to the Network
Faulty network settings can cause connection issues. Forgetting the network and reconnecting to it resets the connection.
Steps:
- Click on the Wi-Fi icon in the taskbar and select “Network & Internet settings,” or go to Settings > Network & internet. Now, click on Wi-Fi > Manage known networks. Select your network and click “Forget.” After that, reconnect by entering the Wi-Fi password.
Method 3: Run the Windows Network Troubleshooter
Windows 11 comes with a built-in troubleshooter that can automatically fix many network problems.
Go to Settings → System → Troubleshoot → Other troubleshooters and run both the Network Adapter and Internet Connections troubleshooters. While this won’t fix everything, it often resets issues related to obvious states.
Method 4: Release/Renew IP and Flush DNS
This is slightly technical but very effective. We will use the Command Prompt.
Open Command Prompt as an administrator and run these commands one by one:
ipconfig /flushdnsipconfig /releaseipconfig /renew
After that, open a website to test it.
Resetting the stack fixes common corruption in IP, DNS, and Winsock components, and it is a low-risk initial step that does not alter any drivers.
Method 5: Reset Winsock and TCP/IP Stack
If the above method did not work, try this.
Run these commands in Command Prompt as Admin:
netsh winsock resetnetsh int ip reset
Reboot the PC after running both commands.
These commands completely refresh the network stack.
Method 6: Change DNS Server (Google or Cloudflare)
If your ISP’s DNS servers are slow or down, switching to a public DNS is a good way to improve connectivity.
Google DNS:
- Preferred:
8.8.8.8 - Alternate:
8.8.4.4
Cloudflare DNS:
- Preferred:
1.1.1.1 - Alternate:
1.0.0.1
how to change:
- Go to Settings > Network & Internet > Wi-Fi or Ethernet. Click on Hardware properties. Then, click Edit next to DNS server assignment.
- Select Manual and turn on IPv4.
- Enter the DNS addresses provided above.
- Click Save and restart the connection.
ISP DNS in India are often slow, so this method is very useful.
Method 7: Disable Power Saving for the Network Adapter
This method is specifically for laptop users.
Depending on your power management settings, Windows may turn off the network adapter when the battery is low, causing Wi-Fi to show “Limited Access.”
Steps:
- Press Win + X and open Device Manager.
- Expand Network adapters.
- Right-click on your Wi-Fi adapter and select Properties.
- Go to the Power Management tab.
- Uncheck “Allow the computer to turn off this device to save power”.
- Click OK.
Additionally, go to Control Panel > Hardware and Sound > Power Options. Select your plan and click on “Change plan settings.” Then, go to “Change advanced power settings,” expand “Wireless Adapter Settings,” and set the “Power Saving Mode” to “Maximum Performance.”
Method 8: Update or Reinstall the Network Adapter Driver
An outdated or corrupt driver is a common cause of limited connectivity issues.
Ensure that the latest version of the driver software is installed for your computer’s network adapter. Right-click the Start button and open Device Manager. Expand the “Network adapters” section, right-click your Wi-Fi adapter, and select “Update driver software.” Choose the option to “Search automatically for updated driver software” and follow the on-screen instructions.
If updating does not work:
Uninstall the device and reboot – this process removes the network adapter and its driver, then reinstalls them upon rebooting, which is an effective way to fix broken or corrupt drivers.
Method 9: Check Adapter Properties (Wireless Mode)
Incorrect adapter properties can be one of the reasons for seeing “Limited Access” on Wi-Fi. Open Device Manager, expand the “Network adapters” list, right-click on your wireless adapter, and select “Properties.” Go to the “Advanced” tab, select “Wireless Mode” under the “Property” list, and set the “Value” to “Auto.” Click “OK” to save the changes and restart your computer.
If the “Wireless Mode” option is not visible, look for “802.11n Channel Width for 2.4GHz” and “802.11n Channel Width for 5.2GHz,” and set their values to “Auto.”
Method 10: Correct the Date & Time
It may seem odd, but incorrect date and time settings can also cause an unstable internet connection.
Press the Windows key, search for “Date & time settings,” and open it. Toggle on “Set time automatically.”
Method 11: Temporarily disable the firewall and antivirus
Antivirus software (such as Norton, McAfee, or Kaspersky) or the Windows Firewall often blocks network connections. Disable them for a few minutes to check if the internet works. If the internet starts working after disabling them, add an exception in the firewall or antivirus settings.
Method 12: Network Reset (Last Resort)
If none of the above methods work, perform a Network Reset. This restores network settings to their default state.
Go to Settings > Network & Internet > Advanced network settings > Network reset. Click on Reset now > Yes. Wait for the PC to restart and check if the issue is resolved.
Note: After a Network Reset, you may need to reinstall and set up networking software such as VPN clients or virtual switches (like Hyper-V).
Method 13: Roll back Windows Update (if the issue occurred after an update)
If you are certain that the update caused the network issue, you can easily restore connectivity by rolling it back. However, this is only a temporary fix.
Steps:
- Go to Settings > Windows Update > Update history.
- Click on Uninstall updates.
- Uninstall the recently installed updates.
- Restart the PC.
Warning: Rolling back the update removes important security patches, which may make the device more vulnerable to security threats.
Some free tools that can help
These free tools can be useful for gaining a deeper understanding of network connectivity issues:
- WinMTR – This combines Ping and Traceroute into one tool. Monitor Packet Loss, Latency, and Network Routes in Real-Time – with no installation required. (winmtr.net)
- Wireshark – This is a free and open-source Network Protocol analyzer that shows network traffic in detail. (wireshark.org)
- Angry IP Scanner – This is a lightweight open-source tool that does not require installation. It scans IP Addresses and Ports in your network and resolves Hostnames. (angryip.org)
- Windows Built-in Tools – ping, ipconfig, netstat, nslookup, tracert – all of these are already built into Windows and are available for $0.
For more information and other technical guides related to Windows 11, visit fixtech.in.
Some additional important points
- Do not change too many settings at once. Make changes within a single category (DNS vs. Stack vs. Driver) and then test.
- Many fixes (such as Winsock Reset, driver rollbacks, or power management adjustments) require a restart to take effect.
- Check other devices on the same Wi-Fi network. If phones and other laptops are working fine, the issue lies solely with your Windows 11 PC.
- In most cases, Windows connects to the Wi-Fi network but fails to reach the gateway or resolve DNS names. Run
ping 8.8.8.8(to check connectivity) andping google.com(to check DNS) to identify where the problem lies.
FAQs – About Limited Connectivity issue
Q1: What does “Limited Connectivity” mean?
It means your PC is connected to the local network (Wi-Fi/Ethernet) but cannot access the internet. Your Windows PC is connected to the local network but not to the internet. You might be able to see other PCs and devices on the local network, but you cannot perform tasks like web browsing, checking email, or streaming music.
Q2: Can Windows Update cause limited connectivity?
Yes, absolutely. This issue has been observed particularly with the Windows 11 24H2 update and affects both Wi-Fi and Ethernet connections.
Q3: What difference will changing the DNS make?
Choose reliable DNS resolvers like Cloudflare (1.1.1.1) or Google (8.8.8.8). If this resolves the issue, you can keep these settings or switch back to “Automatic.”
Q4: What gets removed when performing a Network Reset?
A Network Reset removes all installed network adapters and their settings. After the PC restarts, the adapters are reinstalled, and their settings revert to default.
Q5: Does this issue occur only with Wi-Fi?
No. If Ethernet shows “Limited” while Wi-Fi is working, try changing the cable and testing a different port on the router or switch. This issue can occur with both types of connections.
Q6: My ISP says everything is fine on their end, yet connectivity still appears “Limited”?
In this case, the problem might lie with your PC or router. Try all the methods listed in this guide. If the issue persists after trying everything, it would be reasonable to hold your ISP responsible, as there could be an outage or service limitation on their end. First, test the internet connection on another device.
Conclusion
“Limited connectivity” is one of the most common and frustrating issues in Windows 11, but that doesn’t mean you are helpless. In most cases, simple steps like restarting the router, changing DNS settings, or performing a Winsock reset do the trick. If the problem runs deeper – such as an issue caused by a Windows update or a driver – then a Network Reset or rolling back an update might be necessary. Just remember: try these solutions one by one, don’t rush, and test the connection after each change. If your internet connection is unstable, these methods will effectively resolve the limited connectivity issue.