
Working late into the night on a laptop has become commonplace in India – whether you are a freelancer, a student, or someone working from home. It becomes incredibly frustrating when your eyes start burning and you try to turn on ‘Night Light,’ only to find the button greyed out – unresponsive to any toggle or click. Complaints about Windows Night Light malfunctioning are very common on both Windows 10 and 11. Issues range from the feature failing to turn on or activate according to the schedule to the button appearing completely greyed out. The causes can vary – outdated system updates, corrupted registry entries, graphics driver issues, or compatibility problems with external displays. In this guide, we will explain each cause and its corresponding fix in detail, using simple language.
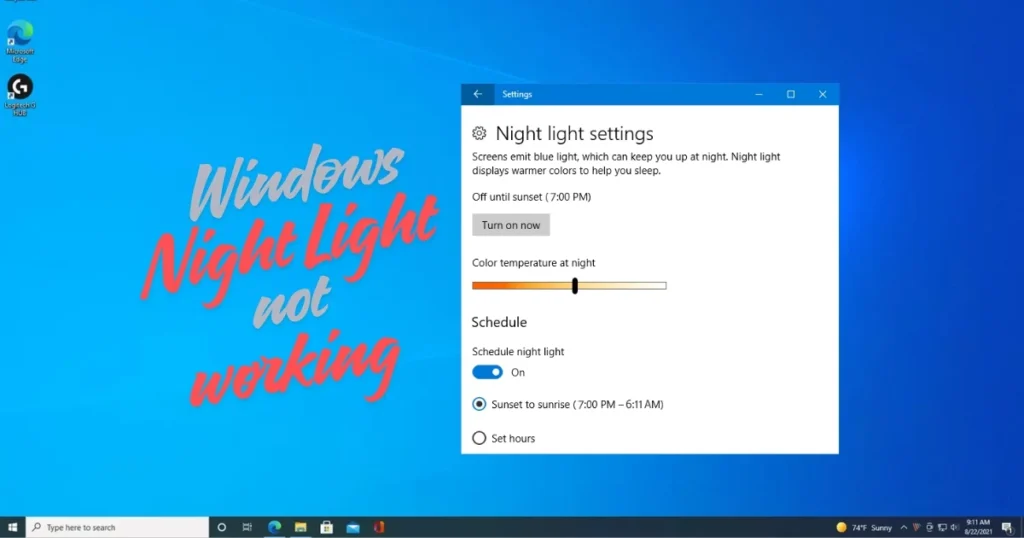
What is Night Light and why is it important?
Night Light is a feature introduced in Windows 10 that shifts your display’s color temperature to warmer tones, particularly in the evening when you are more exposed to artificial light. It serves as a solution to reduce the harmful blue light emitted by the display.
Blue light inhibits the release of melatonin, a hormone that makes falling asleep difficult. When working on a screen at night, the warm orange hue of Night Light reduces eye strain and helps you fall asleep.
Why Windows Night Light Isn’t Working – Key Reasons
Let’s explore the various reasons why the blue light filter might not be working:
1. Night Light is off by default
This is the most basic reason. Many users are simply unaware that Night Light needs to be enabled manually.
2. The graphics driver is outdated or corrupt
The most common reason Night Light doesn’t work is that you are using a faulty or outdated display driver. Updating Windows or the display driver can also cause the Night Light feature to become disabled.
3. The registry entries have become corrupted
The ‘Night Light’ settings appearing greyed out is a common error caused by compatibility issues with display drivers or incorrect registry values.
4. HDR is enabled
The Night Light feature in Windows 11 is incompatible with HDR-supported displays when HDR is enabled. While the HDR feature is used to make images in Windows look vibrant, it sometimes interferes with the Windows 11 Night Light feature.
5. Location Services are off
Location services must be turned on so that Night Light can determine the time of day and evening. If location services are disabled, the Night Light option may be greyed out.
6. Incorrect Date & Time
Incorrect date and time settings can also cause the Windows Night Light option to be greyed out.
7. Docking Station or DisplayLink Issue
If the computer is connected to a docking station, it is the cause of the display problem 99.9% of the time. Docking stations have their own drivers that can severely limit the functionality of computer settings. The Night Light toggle may appear greyed out if you are using DisplayLink docking stations. Night Light can be enabled if the DisplayLink drivers are version 9.0 or higher.
8. Color filters or third-party overlays are enabled
Night Light alters the display color, which can make other color control features appear broken while it is active. First, clear your Windows color settings.
9. External monitor projection mode changed
This issue typically occurs on laptops when switching between display modes (Duplicate → Second screen only → back). When Windows reconfigures these pipelines, the Night Light’s color-temperature processing sometimes fails to re-initialize correctly. Consequently, while the Night Light slider moves, the actual color temperature does not change on either screen until the system is restarted.
10. Unsupported Display Path
Night Light does not appear on unsupported display paths. Microsoft cites DisplayLink and Microsoft Basic Display as examples of drivers where Night Light is not available.
How to fix Night Light – A step-by-step fix
Now, let’s talk about solutions. We’ll start with the easiest fix.
Fix #1: Turn on Night Light and check the strength
The very first and most basic step.
Steps:
- Click the Network or Speakers icon on the right side of the taskbar. Locate “Night light” in Quick Settings and toggle it on.
- Go to Settings > System > Display > Night light.
- Select “Night light” and move the slider in the Strength menu; you will notice the difference as you increase the strength level.
- For a clean test, turn off “Schedule night light,” manually turn on “Night light,” and then adjust the Strength slider again. If you see a manual color change, check your schedule settings. If there is no color change, check your drivers, color filters, HDR settings, or GPU.
Fix #2: Turn on Location Services
If the Night Light schedule is set to “Sunset to sunrise” but isn’t activating, having Location turned off might be the reason.
If “Sunset to sunrise” is unavailable or using the wrong time, enable Windows location access. Go to Start > Settings > Privacy & security > Location and turn on Location services; then, go to Settings > System > Display > Night light and select Schedule night light > Sunset to sunrise.
Note: Only the “Sunset to sunrise” schedule requires Windows Location services. The “Set hours” scheduling option does not rely on sunset calculations. If you do not wish to enable Location, you can manually enter the times using the “Set hours” option.
Fix #3: Correct the Date & Time
Open Windows Settings (press Win + I). Select Time & language > Date & time. Turn on both options: “Set time automatically” and “Set time zone automatically.”
In India, the time zone should be (UTC+5:30) Chennai, Kolkata, Mumbai, New Delhi. An incorrect time zone can disrupt the Night Light schedule.
Fix #4: Update or Reinstall the Display Driver
The most common reason for Night Light not working is a faulty or outdated display driver. Manually update your display drivers from the manufacturer’s website (NVIDIA, AMD, Intel), ensuring you select drivers compatible with your specific Windows version.
In 99% of cases, simply reinstalling the display adapter driver resolves the issue; it is best to download the driver from the manufacturer’s support site based on your specific model, rather than relying on automatic updates.
Steps to reinstall the driver:
- To reinstall a corrupted driver, open Device Manager > Display adapters, right-click the adapter, select ‘Uninstall device’, confirm by clicking ‘Uninstall’, and then right-click Start > Shut down or sign out > Restart. Windows will reinstall the driver after restarting.
If a forced Nvidia driver update has broken a feature, try rolling back the driver: Device Manager > Display adapters > Double-click the driver > Driver tab > Roll Back Driver.
Fix #5: Reset Night Light via Registry (Fix for Greyed-Out Option)
This is the most effective fix when Windows Night Light isn’t working and the button appears greyed out. The issue of greyed-out Night Light settings can be resolved by modifying the corresponding registry key in the Registry Editor.
A user reported: “The fix involving modifying the Windows Registry to correct the Night Light settings solved my problem.”
Steps:
- Press Win + R to open the Run window. Type
regeditand press Enter to open the Registry Editor. Navigate to this path: HKEY_CURRENT_USER > SOFTWARE > Microsoft > Windows > CurrentVersion > CloudStore > Store > DefaultAccount > Cloud. Expand the Cloud folder and locate these two entries:default$windows.data.bluelightreduction.bluelightreductionstateanddefault$windows.data.bluelightreduction.settings. - Delete both of these entries and reboot your PC.
- After restarting, go to the Night Light option, and you will find it working correctly.
Keep this in mind before editing the Registry:
- The Registry Editor contains important data that affects your system. Incorrect handling can lead to system crashes; therefore, backing up the registry is essential.
- Make sure to create a System Restore Point.
Fix #6: Toggle HDR
Try turning HDR off and then on again. Open Windows settings. Click on System > Display. Disable the “Use HDR” option and then re-enable it. Now check the Night light issue; it should be resolved.
On HDR displays, enabling Night light can cause a red tint, making content difficult to read. Go to Settings > System > Display > Night light. If Night light is on, drag the Strength slider to the left to reduce the red tint.
Fix #7: Turn off Color Filters
Press the Windows logo key + U, select Color filters, and then turn off Color filters. If the shortcut is enabled, pressing the Windows logo key + Ctrl + C also toggles color filters.
Some users have reported that colors appear distorted when multiple color-adjustment utilities (such as Night light and third-party overlays) run simultaneously. If the colors look incorrect, close any third-party tools and restart Night light to identify the cause.
Fix #8: Sign out and sign back in
Click on your profile picture and select “Sign out.” Restart your device and sign in again. This can resolve settings issues associated with your account.
One user noted, “You need to ensure you are logged into your Microsoft account; only then will the Night Light options work again.”
Fix #9: Restart the graphics stack
Restart the graphics stack by pressing Win + Ctrl + Shift + B. This shortcut resets the display driver without restarting your PC.
The screen will go black for a moment and then come back on. After that, try turning on Night Light.
Fix #10: Disconnect the Docking Station
If you are using a docking station, disconnect it and connect the computer directly to the monitor using the appropriate cable.
If you are using DisplayLink docking stations, the “Night light” option will remain greyed out unless you have DisplayLink driver version 9.0 or higher installed. Download the latest driver from the official DisplayLink website.
Fix #11: Run SFC and DISM scans
Open the Command Prompt as an administrator, copy and paste the command DISM /Online /CLEANUP-IMAGE /RestoreHealth, and press Enter. Once that completes, type SFC /scannow and press Enter. These commands will replace missing system files.
Restart your PC and test the Night Light feature.
Fix #12: Update Windows
Install the latest updates by going to Settings > Windows Update > Check for Updates.
Many users have reported issues with the Night Light setting – it fails to activate or deactivate at the scheduled time, turns on and off randomly on its own, and shows no response when selecting “Turn on now” or “Turn off now.” A Windows update might provide a fix for this bug.
Fix #13: Test by creating a new user account
If registry fixes didn’t work, create a new user to see if Night Light functions for that user. Press Windows + R, type netplwiz, press Enter, and then click Add. Choose the option to proceed without a Microsoft account and create a local account. Once created, select the new user, go to the Group Membership tab, and grant them administrator privileges.
If Night Light works on the new account, the issue lies with your user profile; migrating data from the old profile to the new one is the best course of action.
Fix #14: Use System Restore
System Restore can revert your computer to a previous state from before the problem occurred. However, this method requires that you have previously created system restore points.
Press Win + S and search for “Control Panel.” Press Enter to open the window. Select “Recovery.” Click on “Open System Restore.”
Some additional important points
- Do not keep Night Light active while changing display modes. First, turn off Night Light, change the display mode, and then turn Night Light back on.
- Night Light alters color rendering and is not suitable for color-critical tasks such as photo editing, video grading, or print proofing. Disable Night Light when accuracy is essential.
- Enable the Night Light schedule so it turns on and off automatically, rather than toggling it manually every time.
- Try restarting first – if Night Light appears greyed out, the first step is to restart the device. If that does not work, further troubleshooting will be required.
Free Tools – Use these alternatives if Night Light isn’t working.
If nothing else works, switching to alternatives like f.lux is the best option. It is also available as a Windows app.
- f.lux (Free) – f.lux adjusts your computer screen to match the lighting of your room. It shifts the display to resemble indoor lighting after sunset and sunlight in the morning. Simply tell f.lux what kind of lighting you have and where you live, then forget about it – f.lux handles the rest automatically. (justgetflux.com – $0, completely free)
- LightBulb (Free, Open-source) – LightBulb runs in the background, continuously adjusting gamma levels based on temperature profiles to make colors appear warmer at night. It functions similarly to f.lux but is more lightweight. (Free on GitHub)
- CareUEyes (Free Lite Version) – While f.lux is a color temperature scheduler that warms the screen but cannot reduce brightness, CareUEyes offers the same blue-light filtering functionality plus a true screen dimmer overlay and a break timer. The Lite version – featuring the screen dimmer, blue-light filter, and break timer – is completely free with no time limits. (CareUEyes Pro – $9.90/lifetime)
- Iris Mini (Free) – Iris Mini provides free, cross-platform blue-light reduction and PWM flicker-free brightness control. It features a minimalist, portable, and automatic design – offering relief from eye strain without the hassle. Simply double-click to activate. (Iris Pro – $10 one-time)
Be sure to visit fixtech.in for more detailed Windows troubleshooting guides.
FAQs – About Windows Night Light
Q1: The Night Light button is greyed out – what should I do?
The first step is to delete the blue light reduction entries from the Registry Editor. The process is quite simple: go to the Windows Registry Editor settings and delete the two relevant entries. Follow “Fix #5” mentioned above. If that doesn’t work, reinstall the display driver (Fix #4).
Q2: Night Light is on, but I don’t see any color change – why?
Night Light alters the display color, which can cause other color control features to malfunction or appear broken. Turn off color filters (Windows key + Ctrl + C). Also, check the Night Light Strength slider; if it is set too low, the difference won’t be noticeable.
Q3: Night Light isn’t working on the schedule – is the “Sunset to sunrise” option missing?
If “Sunset to sunrise” is unavailable, enable Windows location access. Go to Settings > Privacy & security > Location and turn on Location services. It is also essential that the Date & Time settings are correct.
Q4: Night Light turned off after connecting an external monitor – what should I do?
If the issue persists even with up-to-date display drivers, a supported workaround is to restart the device if Night Light becomes unresponsive after changing projection modes. Turn off Night Light before changing the display mode.
Q5: Can HDR and Night Light be used together?
Night Light may be incompatible with HDR content or behave unpredictably; HDR pipelines use different compositing and tone mapping processes that can interfere with OS color filters. If Night Light is active, drag the Strength slider to the left to reduce the intensity of the blue light reduction.
Q6: I am using DisplayLink or the Basic Display driver – Night Light isn’t appearing at all?
Night Light does not work on unsupported display paths. Microsoft has cited DisplayLink and Microsoft Basic Display as examples of such drivers. In this case, use third-party tools like f.lux or CareUEyes.
Q7: I’ve tried everything, but Windows Night Light still isn’t working – what now?
Use System Restore (Fix #14) or test by creating a new user account (Fix #13). If the issue persists, switch to a free alternative like f.lux. Visit fixtech.in for further assistance.
Final Thoughts
The issue of Windows Night Light not working might sound daunting, but in most cases, it can be resolved with simple steps like resetting the registry, reinstalling display drivers, or enabling location services. If Night Light goes missing, try updating drivers, checking for HDR and display adapter support, and restarting the graphics stack – these steps resolve most reported problems. In India, display driver issues are the most common cause on budget laptops and external monitors; therefore, installing the correct driver from the manufacturer’s website is often the most effective solution. Try the fixes mentioned above one by one, explore free alternative tools, and be sure to visit fixtech.in for more Windows troubleshooting tips. Once you find the right setting, issues like Windows Night Light failing to work will be resolved for good.